Supply list
2 pieces of fabric 30x30 (I used one cotton and one minky)
1 package satin blanket binding
sewing machine with matching thread
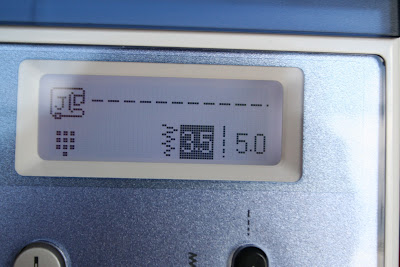
First set your stitch length as long as it will go to do a basting stitch. Mine is at 5.0
Stitch down the edge of your satin binding. Do not back stitch and leave the threads long-
Now pull the top thread to ruffle your satin-
Pin your ruffled satin onto the bottom edge of the right side of one of your fabrics-
It's very important to be sure you switch your stitch length back to a standard size at this point. Mine was at 2.5-
Now stitch through your fabrics with the satin sandwiched between the two fabrics which are right sides together-
Go around 3 and 3/4 of the sides leaving a small space to turn the blanket right side out. When you turn it, it'll look like this with a small opening-
Fold the remaining satin into the opening and pin in place.
I had about 15 inches of extra ribbon I trimmed off. Save it for a coordinating burp cloth or something fun like that!
Then carefully sew along the edge closing off your open space. I decided to top stitch around the entire blanket this time, although you don't have to.
Here is a look at the where the edges of satin met. See how I folded one inside the other. The one I trimmed I rolled under a couple of times before sewing it in place so the edge won't fray.
Finished! I hope this new little baby loves it!
Before giving this as a baby gift I rolled it up with all the ruffles at the top and tied it with a ribbon
Here is my daughter's version of the same blanket. She LOVES hers. We keep it in the car and it's the perfect size to tuck around her when it's cold or ball up and use as a pillow on long trips, or just snuggle with on car rides!


